User Access Policies
Salesforce User Access Policies will be Generally Available in the Summer ’24 release. Configuring these policies can make onboarding new users so much simpler.
To use them, first you need to enable some settings. If you select the first one, the second one will be automatically selected.
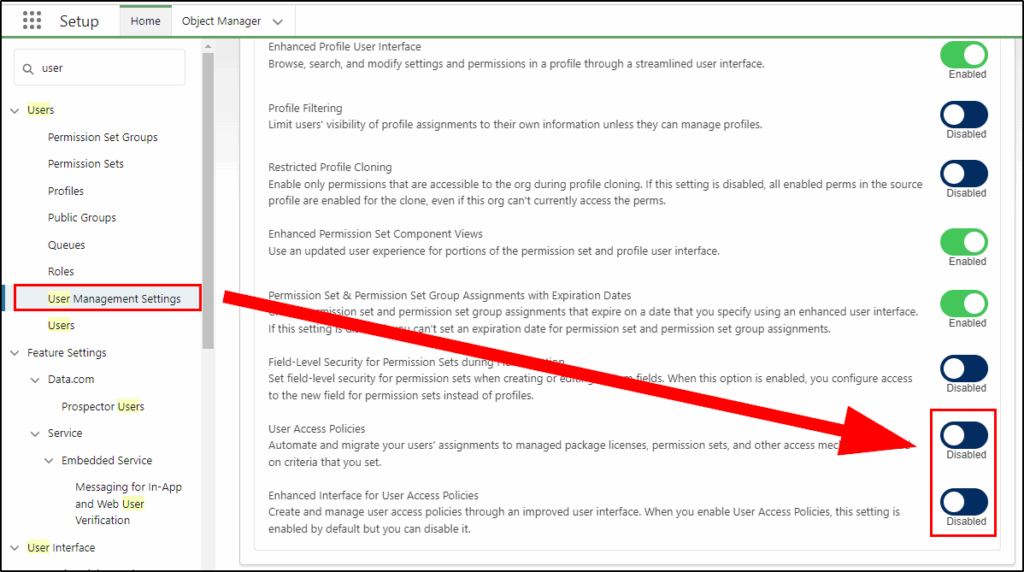
Next, click New User Access Policy.
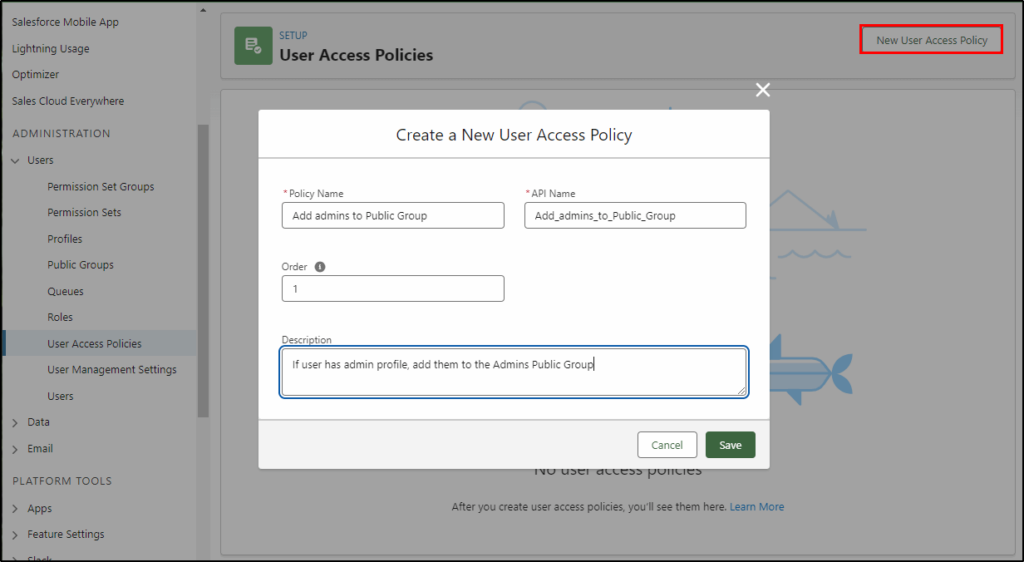
In this example, you will create a new policy that will automatically add users with the System Administrator profile to the Public Group “Admins”. This group has access to many report folders and record sharing settings that you want all admins to access.
Give the new policy a name, order and description.
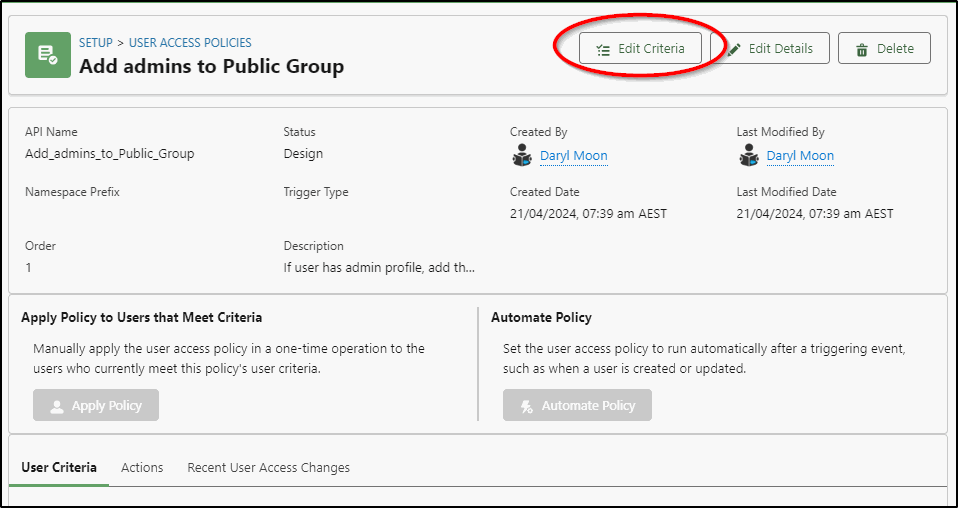
Next, Edit the Criteria for your new policy:
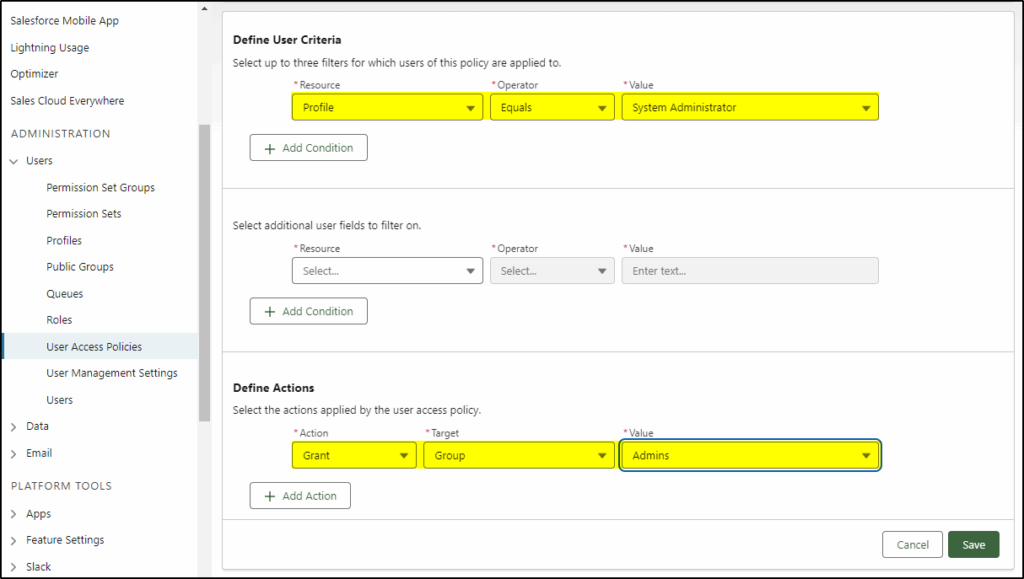
Enter the criteria that will select the user records you want to modify. Next, define the actions you want to apply.
In this example, select the profile = System Administrator and for the action select grant access to the public group “Admins”.
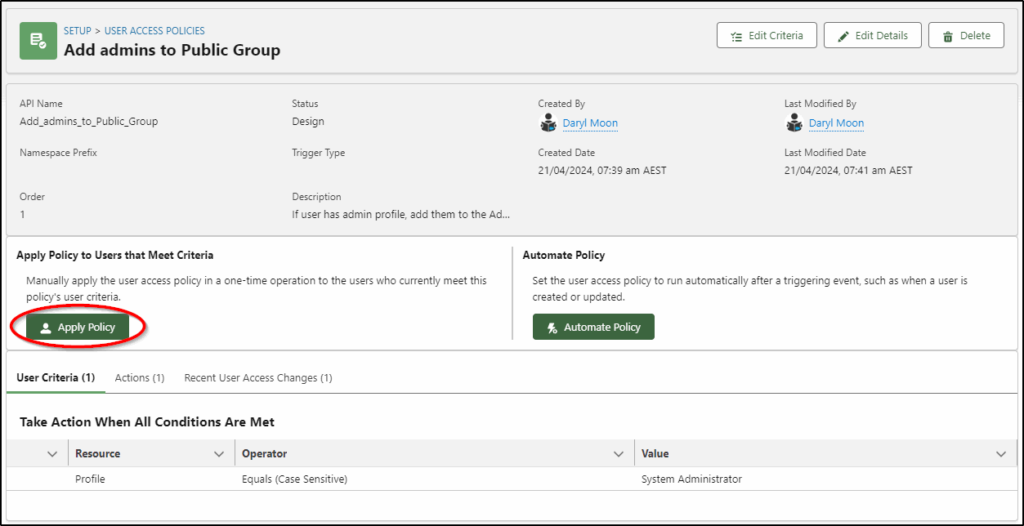
You can now manually apply the policy (a good way to test it is going to select the correct records).
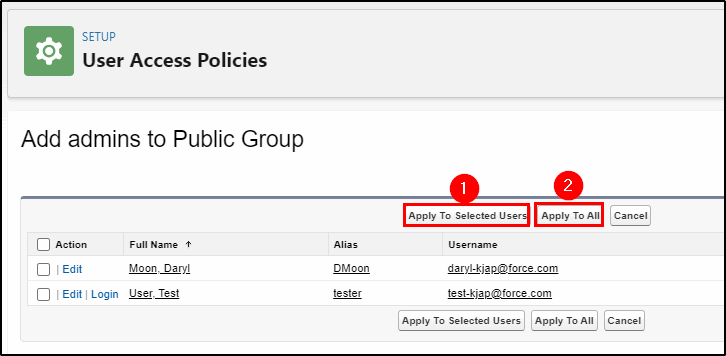
Now you can select which users you want that to apply to (1) or select Apply to All (2).
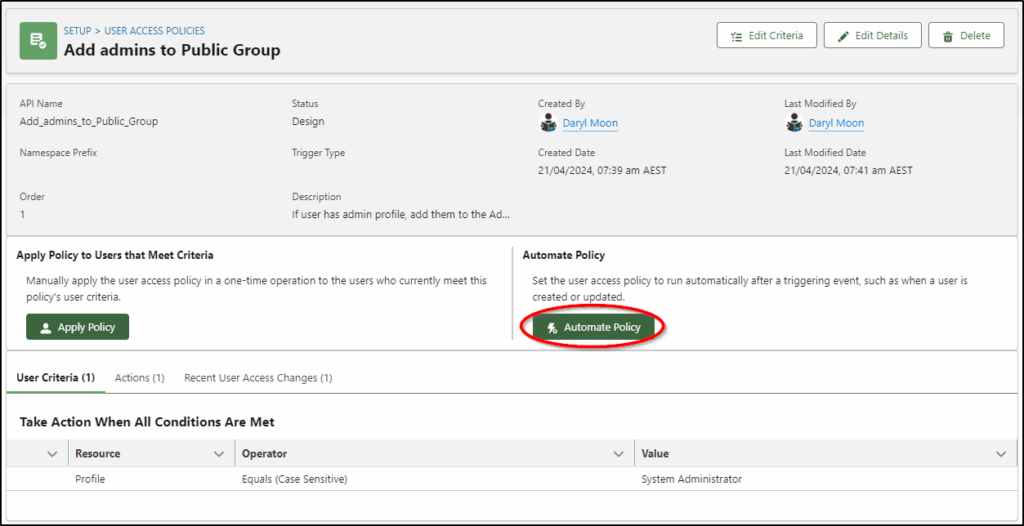
Once you are confident your policy is selecting the correct records and is applying the policy correctly, automate this policy:
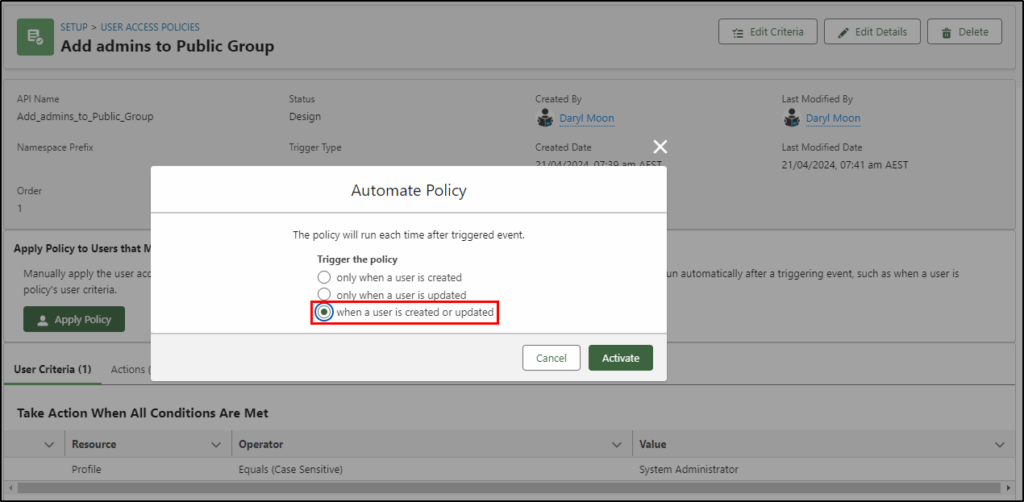
Finally, select when the policy will automatically run:
Warning: The policy does not automatically remove the user from the Public Group when they no longer have the System Administrator policy. For that you may need a second policy to remove them from the group or have a regular activity to manually audit public group access.


