Deploying flows to production with Change Sets
Deploying flows to production with Change Sets is a key skill to have when developing and testing your new flows. The best practice is to do this in a sandbox (eg a developer sandbox) where it is safe to make mistakes and break things. It’s not until they are all working and tested that you should consider moving them to your production (work environment where you users are using Salesforce on a day-to-day basis).
But how do you move the flow once testing is complete? Deploying flows to production with Change Sets is one easy and free option. You can use other paid tools like Gearset and Copado to do the same but if you don’t have these tools then Change Sets will do what you need.
A Change Set is a package of configuration (metadata) that contains your flow and anything else needed to deploy your new flow into another environment. Perhaps you defined some extra custom fields, some profile changes, and some page layouts to go with your flow, these can be included in your Change Set too.
Note: You can’t use changesets in a developer org or a trailhead playground as they do not have a connection to a production org.
Here are the steps involved in deploying flows to production with Change Sets:
- Setup a connection between your sandbox and production
- Create a change set
- Upload the change set
- Deploy the change set
- Activate your new flow
- Check everything is working
Setup a connection between your sandbox and production
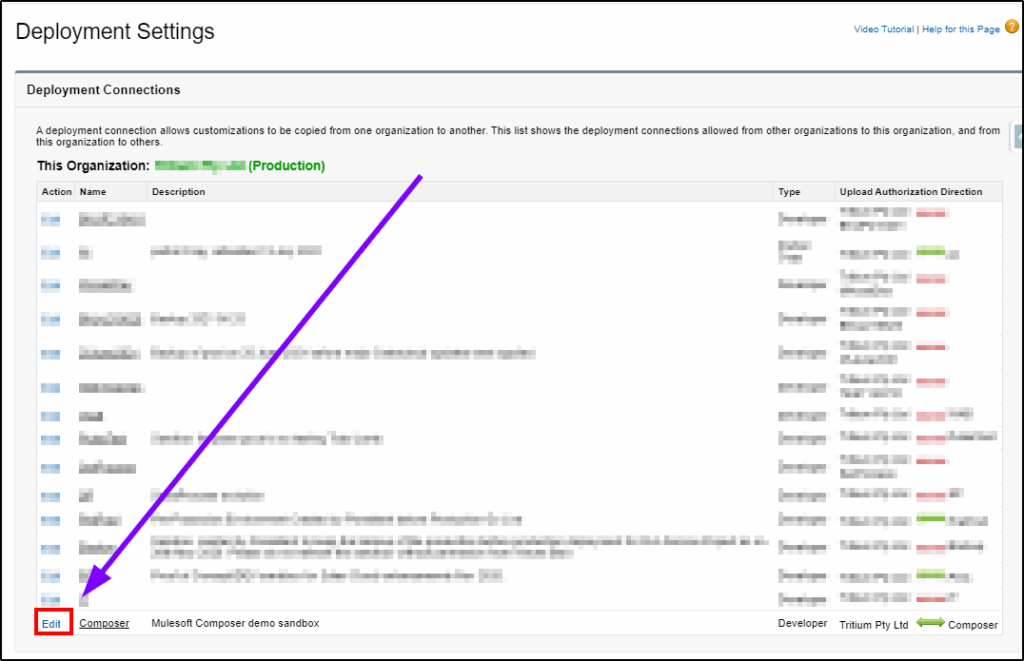
The first step in Deploying flows to production with Change Sets is starting from your production environment, select setup -> Deploy – Deployment settings.
Select edit beside your sandbox name.
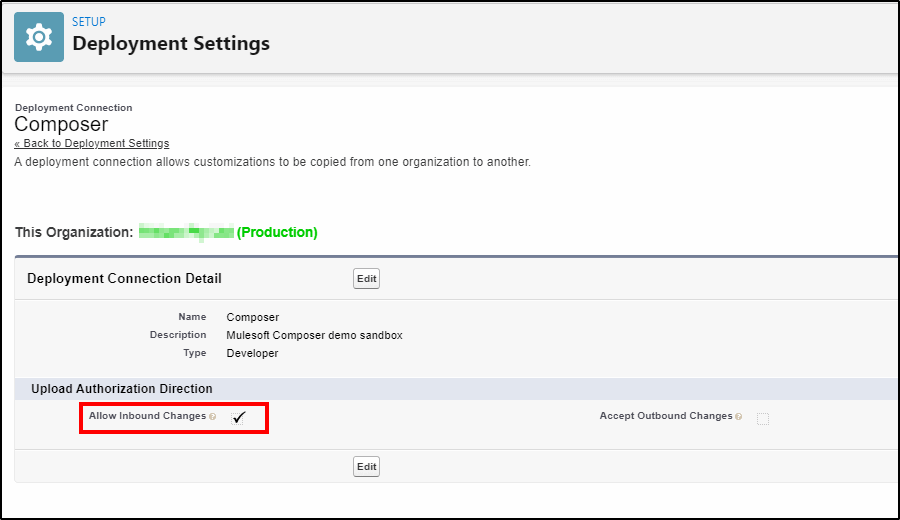
Check the box to “Allow Inbound Changes”.
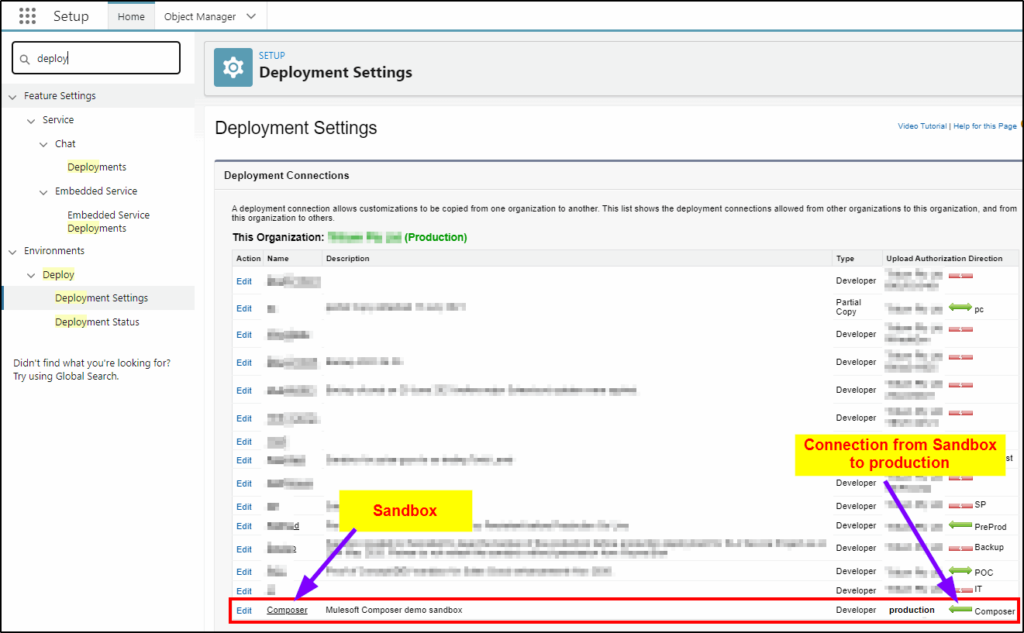
Go back to the Deployment Settings and you will now see the connection with the green arrow pointing from your sandbox to your production environment, indicating you have a one-way connection. You can send Change Sets from your sandbox to production but not the other way around.
There are times when you may want to go both ways – for example it is usually acceptable to develop new reports in production (depends on your company policy) so if you want to have a copy of these reports back in your sandbox, you can use a Change Set to copy these back.
Create a change set to send to production
Now we have the connection between production and the sandbox, we are ready to prepare our Change Set.
Make sure your flow is activated and you have thoroughly tested it.
Login to the sandbox to create the Change Set.
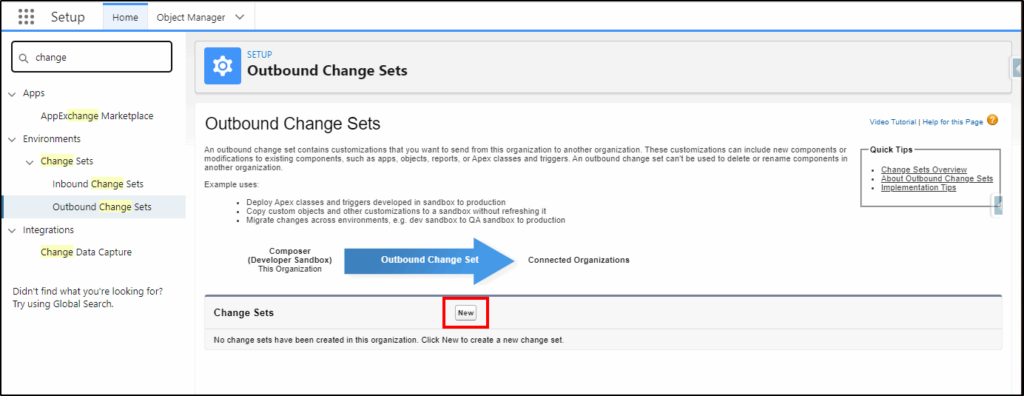
Setup -> Change Sets -> Outbound Change Sets
Click New to create your Change Set.
Give the change set a name and a useful description of what it contains.
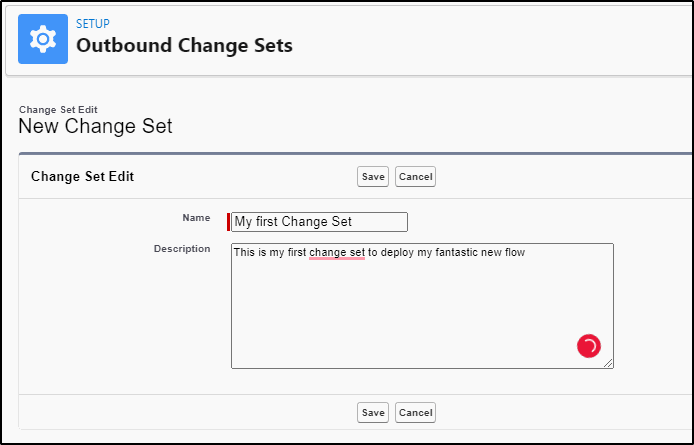
Click Save
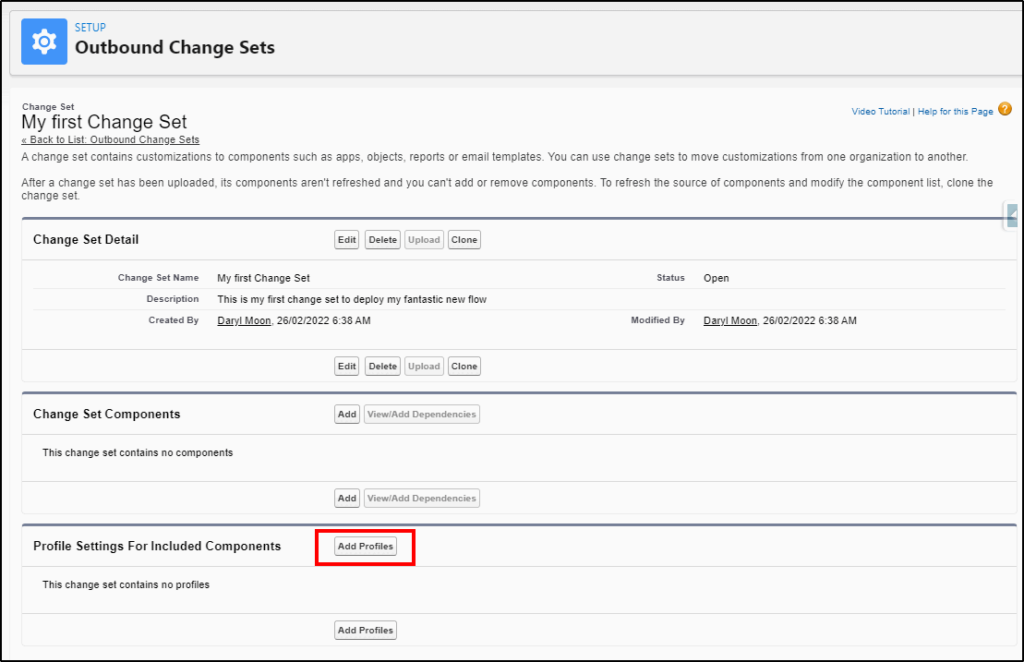
Start with Adding Profiles to the Change Set
Before you get too excited and forget about any profiles that may need to be updated with this Change Set, add all the profiles that may be impacted. If you created a new field then the Field Level Security permissions for this new field will need to be included for the relevant profiles.
If you are not 100% sure, add ALL profiles, it won’t do any harm if they are not needed, they will not be included in the Change Set.
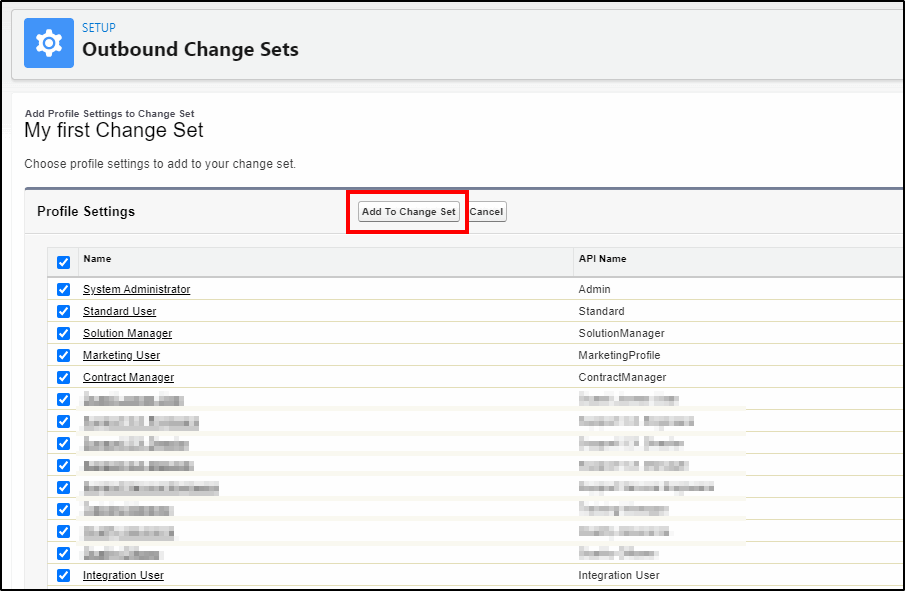
Select the profiles and add them to the Change Set.
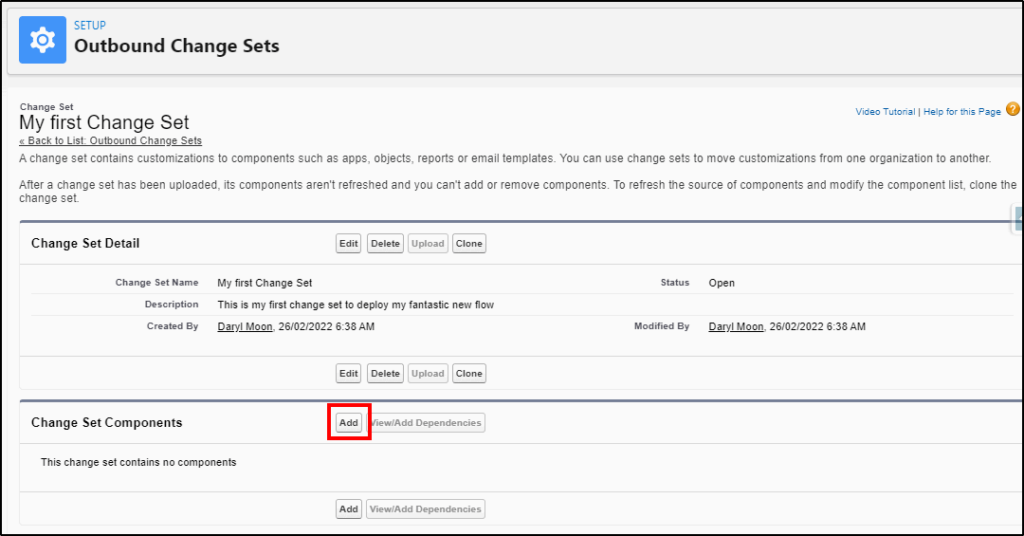
Add components to the Change Set
Next, add our components:
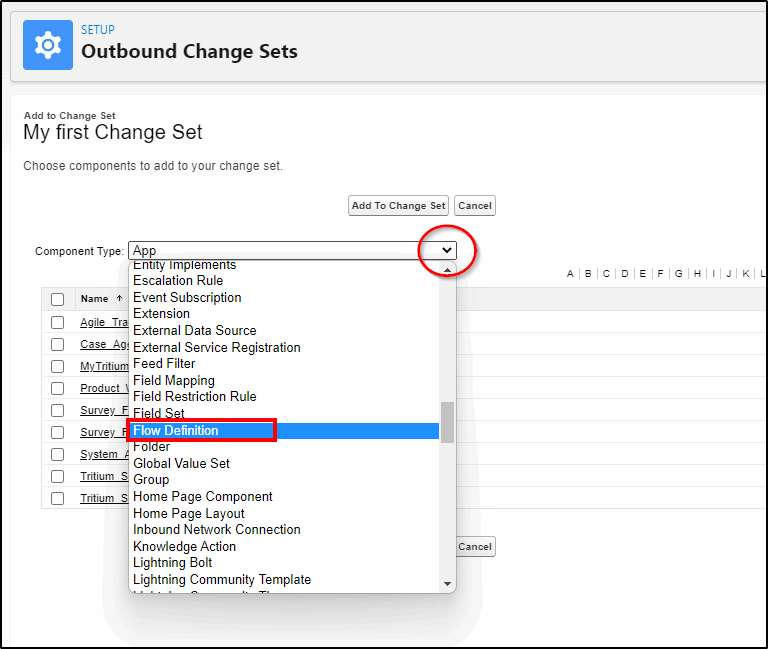
From the Component Type drop-down list, select Flow Definition:
Select your flow and Add to the Change Set
Note: If your flow is not visible here, go back and check that you have made it active.
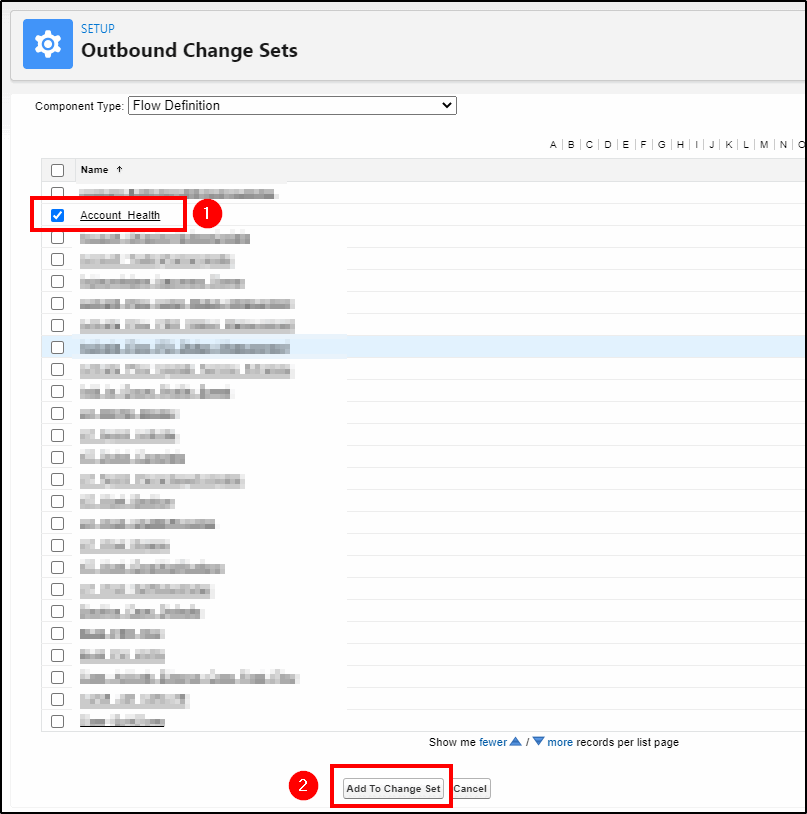
If you have other components you need to include in this Change Set, add more before proceeding.
Note: Any new fields you have created are under the Component Type: “Custom Fields”, page layouts are Page Layouts, Lightning Record Pages are Lightning Pages etc.
Upload the change set to Production
Now you have added your flow, it is ready to upload to production:
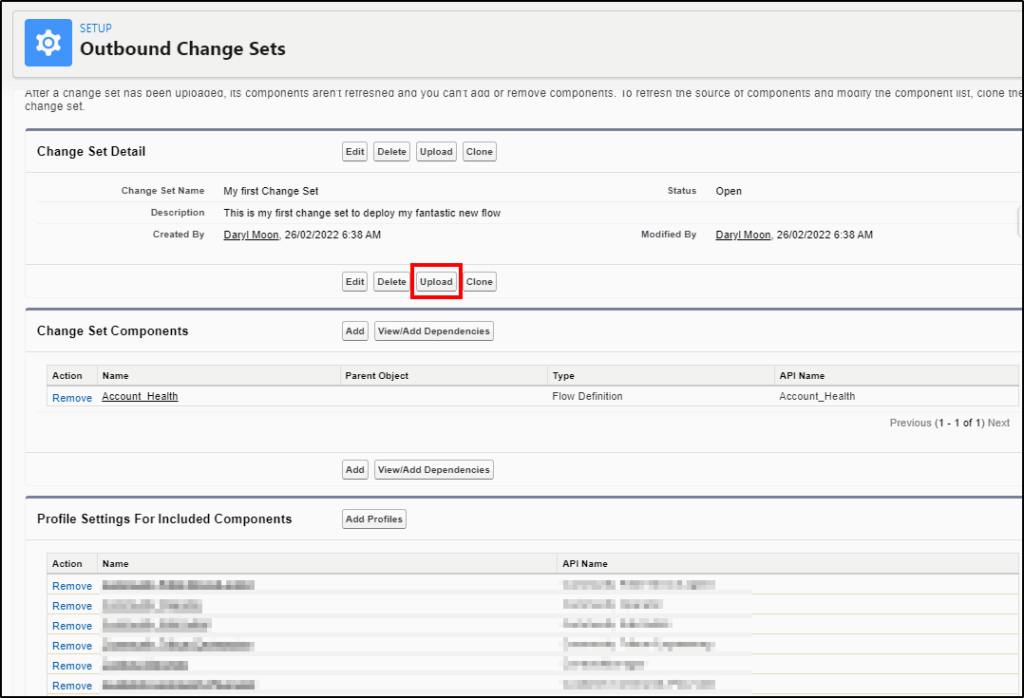
Click the upload button:
Select the environment we want to upload it to, in this example, we only have one choice:
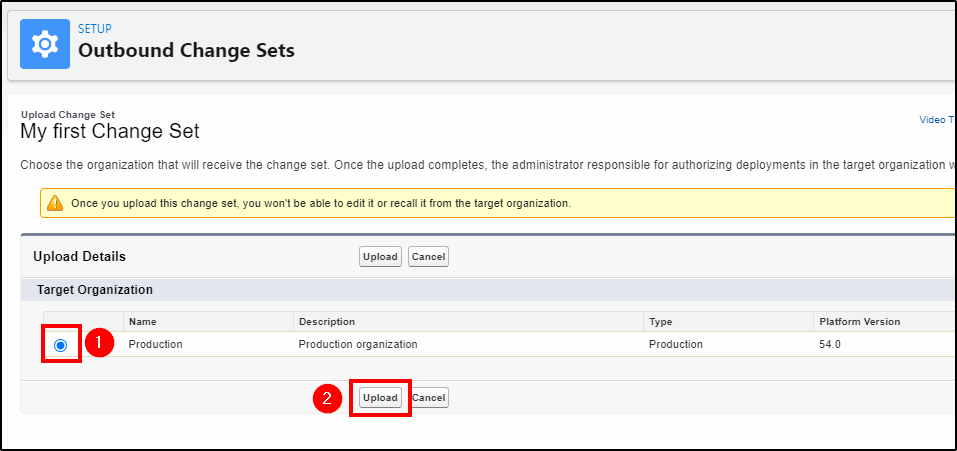
Now your flow is on its way to Production.
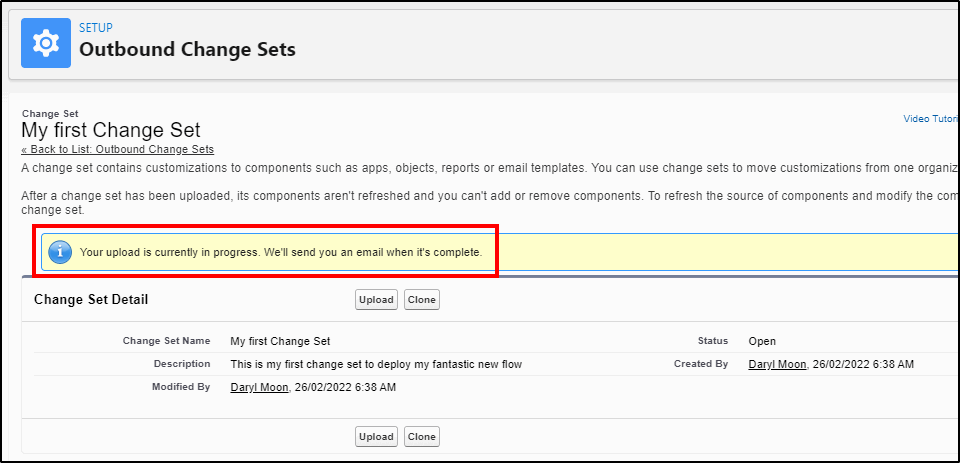
Wait for it to arrive in Production
Now grab a coffee because this can take 5-10 mins before it arrives in Production, ready to deploy.
Behind the scenes all the components are being packed up and copied across to production.
You will receive an email notifying you when it is ready for deployment.
When you receive the email, login to Production to deploy it.
Deploying flows to production with Change Sets
Setup -> Change Sets -> Inbound Change Sets
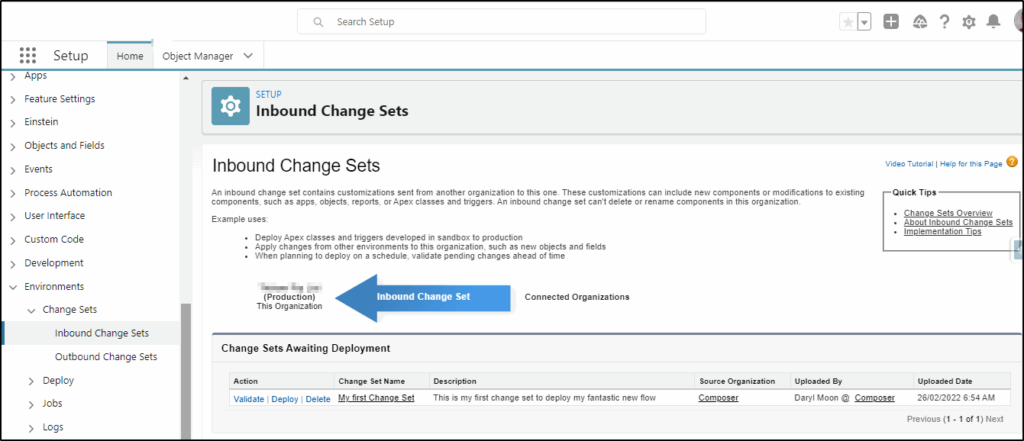
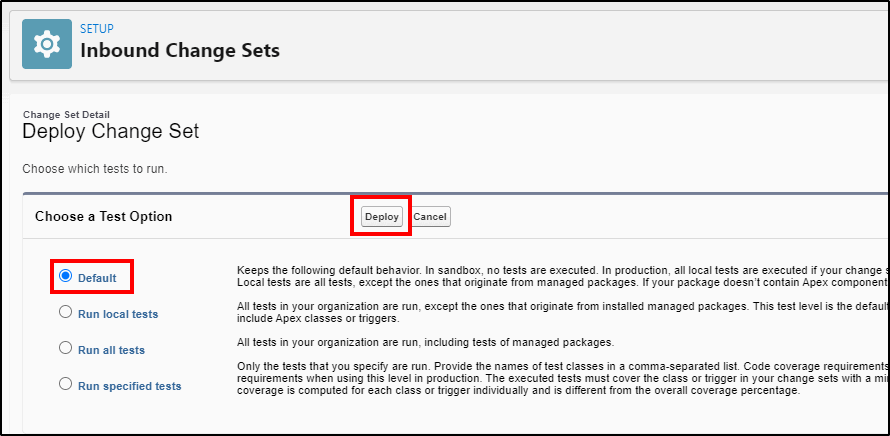
Click the Deploy link, select Default and then click the Deploy button.
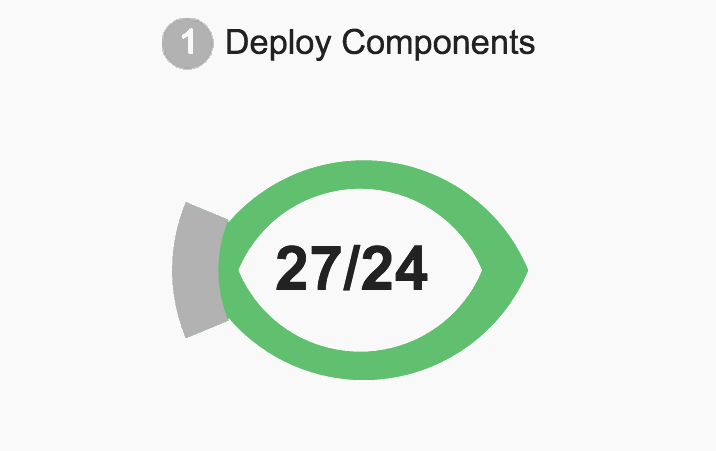
Click the link for Deployment Status and watch the fun happen. Hopefully, after a few minutes, you will get this success message:
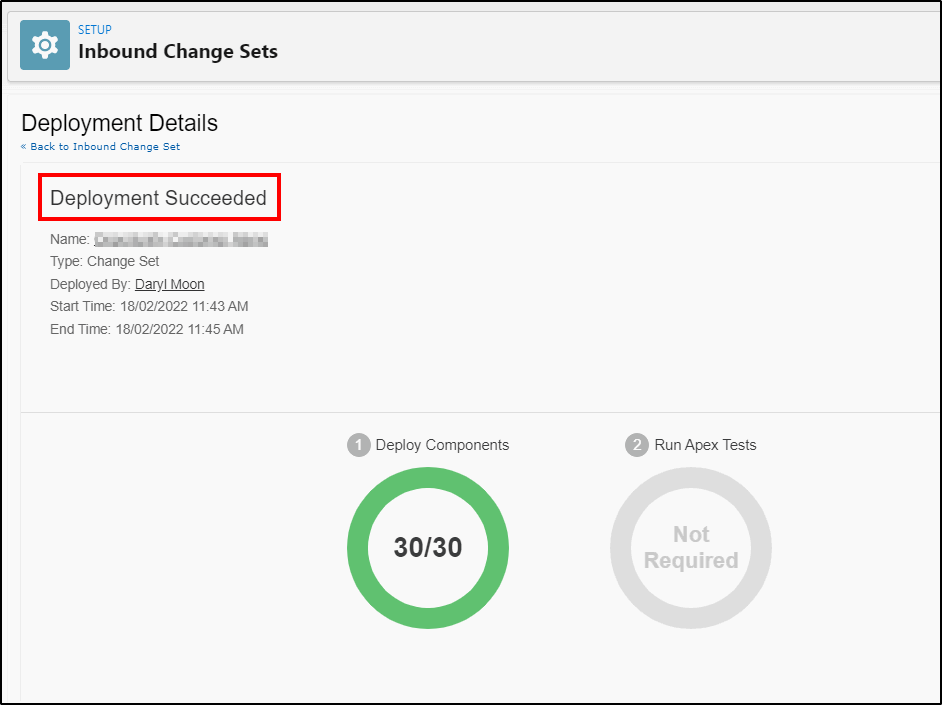
Note: The number of components being deployed may only be 1 but you may see something weird like 15/1 components (the extras are the profiles being added). The donut graphic will also do crazy things and sometimes look like a fish!
Activate your new flow
When your deployment has been successful, go and check your flow is there and activate it. By default, flows are deployed in an inactive state.
Check everything is working after deploying your change set
Check that your flow works as expected and celebrate!
Change Set Deployment Failed?
If something went wrong, you forgot to include profiles or you didn’t include a new field in your Change Set, go back to the developer org and clone the Change Set and then you can add the missing component and start the deployment process again. (you can’t edit Change Sets).
Note: It’s a good idea to put a version number on your Change Set name so you will be able to see that your new Change Set has arrived ready for deployment.


Well, when you get to the Change Set definitions, my sandbox has no picklist item for Flow Definitions. So, no joy for me.
Hmm, that is really strange. Do you have any active flows? Flows will not show if they are not active. If you have none active I don’t know if it will do what you are experiencing.
Thanks Daryl. What if in addition to the flow, i also u have an existing formula field and another picklist field and page layout that I only updated in my sandbox environment, can I deploy them with Change sets as well.
Yes you can include those other items in the same change set as the flow. Sometimes you may find that one item needs to be present before it can be used in a changeset, in that case you just create a nother change set and deploy it first.